Documents & imaging
The patient profile has a general file library for X-rays, photos, consent forms, referrals, lab results and other paperwork — with optional FDI tooth-tagging of images so they surface automatically in the tooth chart. The two sections are Imaging (Образна диагностика: X-rays and photos) and Documents (Документи: every file). This guide covers uploading, tagging and deleting. For the official NHIS ambulatory sheet with the patient’s pen-tablet signature and the doctor’s KEP token, see the articles under the NHIF & NHIS category. The app screenshots show the Bulgarian interface; every label below gives the Bulgarian original in parentheses.
At a glance
- Uploading is from More actions → Upload document (Още действия → Качи документ) on the patient profile, from Upload image (Качи снимка) in the Imaging section, or from Upload first document (Качи първи документ) in an empty Documents section — the same window opens each time.
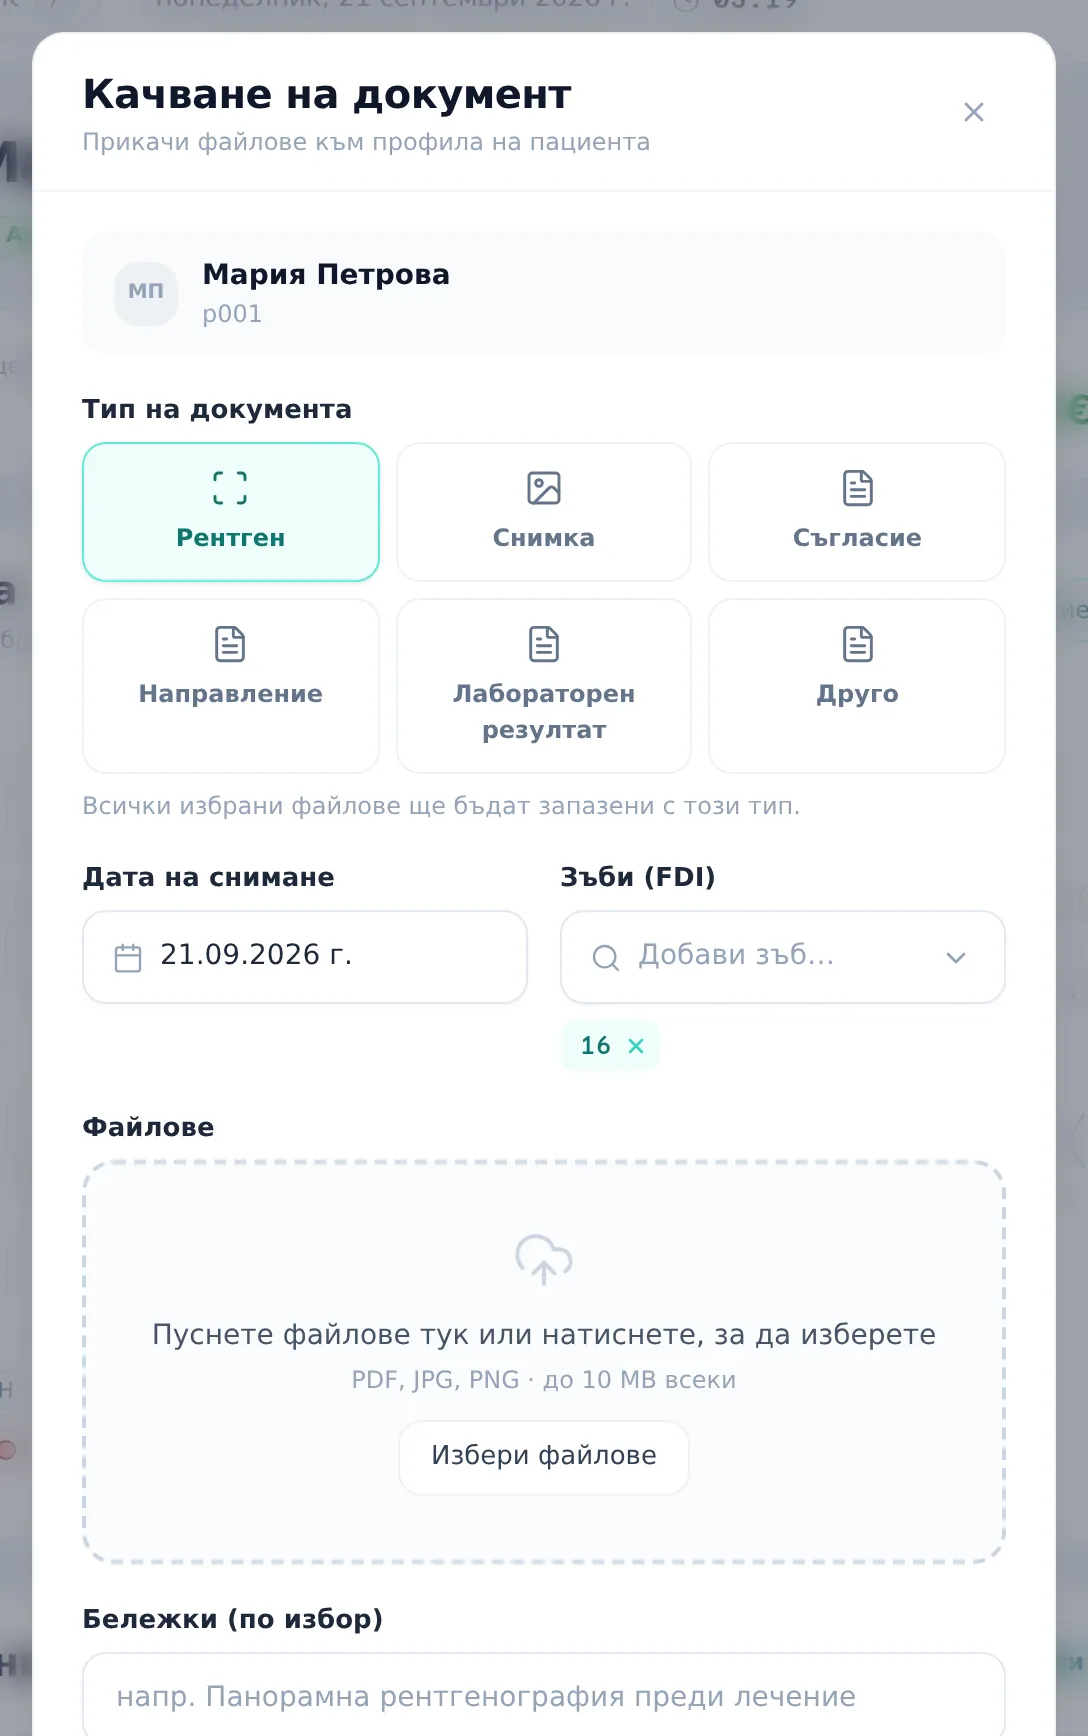
- Files are PDF, JPG or PNG, up to 10 MB each. The types are X-ray, Photo, Consent, Referral, Lab report and Other (Рентген, Снимка, Съгласие, Направление, Лабораторен резултат, Друго).
- X-ray and Photo types get a capture date and FDI tooth-number tags, so they surface in that tooth’s inspector.
- Uploading is available to Admin, Front Desk or Doctor.
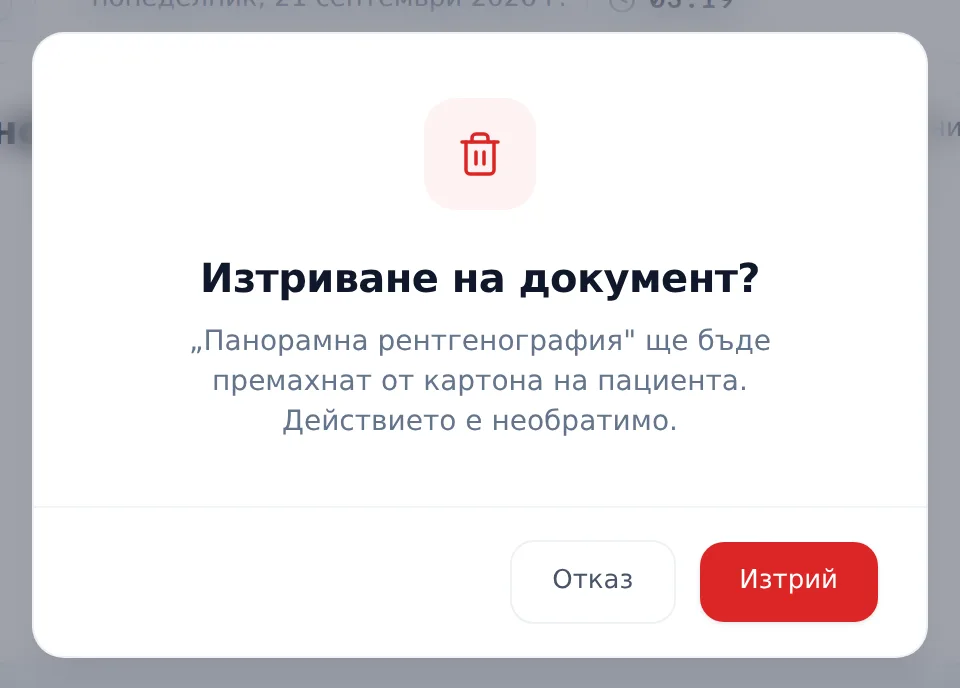
- Deleting is irreversible — the file leaves the patient’s record for good.
- Files uploaded by the clinic are also visible to the patient in the portal (the “From clinic” tab) if they have portal access.
Uploading a document or X-ray
- Click More actions → Upload document (Още действия → Качи документ) on the profile (or Upload image (Качи снимка) in Imaging).
- Pick the Document Type (Тип на документа): X-ray, Photo, Consent, Referral, Lab report or Other. Every file in this upload gets the chosen type.
- For X-ray and Photo, set the capture date (Дата на снимане) and add one or more teeth (Зъби, FDI) so the file shows up in that tooth’s inspector. Without a tooth the image counts as panoramic or general.
- Drag files onto the uploader (PDF, JPG or PNG, up to 10 MB each) and watch per-file progress. A file over the limit is rejected with an error and not uploaded.
- Click Upload (Качи) (the button shows the number of ready files). Each file is saved under its own name without the extension. If a file fails to save it stays in the list so you can try again.
The Notes (optional) (Бележки (по избор)) field in the window is not saved for uploads in a live clinic for now — don’t put anything important in it.
Viewing images and documents
- Imaging (Образна диагностика) shows X-rays and photos as thumbnails (newest first, by capture date) with the filters All (Всички), X-rays (Рентген) and Photos (Фото). Clicking a thumbnail opens the image viewer (Преглед на снимка): zoom in/out, rotate, previous/next image, Download (Изтегли) and Delete (Изтрий). There you can change the capture date and add or remove teeth — the change is saved at once.
- For a format with no inline preview (for example PDF) the viewer tells you to download the file.
- Documents (Документи) lists every file with its name, type, size, date and a badge From clinic (От клиниката) or From patient (От пациента) (files the patient shared from the portal). A row has only a trash icon — opening and downloading is available only in the image viewer (for the X-ray and Photo types) for now.
- Photos uploaded from a treatment plan (the Upload photos (Качи снимки) button in the patient document — JPG, PNG or WEBP) are saved here too, as Photo or X-ray.
Deleting a document
- Hover over a row in the Documents section and click the trash icon (or Delete (Изтрий) in the image viewer).
- Confirm in the modal — the text warns the file “will be removed from the patient’s record. This action is irreversible.” (ще бъде премахнат от картона на пациента. Действието е необратимо.) The file is also removed from storage, and the deletion is recorded in the audit log.
Frequently asked questions
Can I undo deleting a document by mistake? No — deletion is irreversible and removes the file from the patient’s record permanently. Double-check before confirming.
How does an X-ray end up in the tooth chart? Add FDI tooth number(s) to an X-ray or Photo during upload — it then appears automatically under the Images (Снимки) section of that tooth’s inspector. You can also add or remove the teeth later from the image viewer. See The tooth chart.
Is there a file size or format limit? Yes — PDF, JPG or PNG, up to 10 MB per file. Larger files or other formats (for example DICOM) can’t be uploaded through this section.
Does the patient see the uploaded documents? Yes, if they have portal access: everything the clinic uploads appears in their portal under “From clinic”, whatever the type. Don’t upload internal paperwork to the record if you don’t want the patient to see it. See Documents & messages.
Is this where the official NHIS ambulatory sheet gets signed? No — this section is a general file library. Signing the official ambulatory sheet (D001), with the patient’s pen-tablet signature and the doctor’s KEP token, is a separate flow that starts from “New ambulatory sheet”. See Logging treatments & visits and NHIS documents: D001, D003, D007.
Who can upload and delete documents? Admin, Front Desk and Doctor all have upload and delete access in this section. There is no separate permission or approval step for deleting.