Patient records
This guide shows how to add a new patient, search and filter the list, edit or archive a record, and link a guardian to a dependent. It applies to Admin, Front Desk and Doctor — role differences are called out where they matter. The app screenshots show the Bulgarian interface; every label below gives the Bulgarian original in parentheses.
At a glance
- Click Add Patient (Добави пациент) at the top right of the Patients list — fill in a 3-step wizard (the step bar is at the top and each step is split into titled sections), or scan an ID to auto-fill.
- Any role can add a patient; only Admin and Front Desk can edit; only Admin can delete.
- Archive (Архивирай пациента) reversibly hides the patient from the lists; Delete (Изтрий) cannot be undone from the app and removes the patient and their records from the clinic.
- Search matches name (in Bulgarian or English), phone, email or patient ID. Archived patients show only under the Archive filter.
- A guardian or dependent is linked from the last (“Family”) step of the add/edit wizard.
Adding a new patient
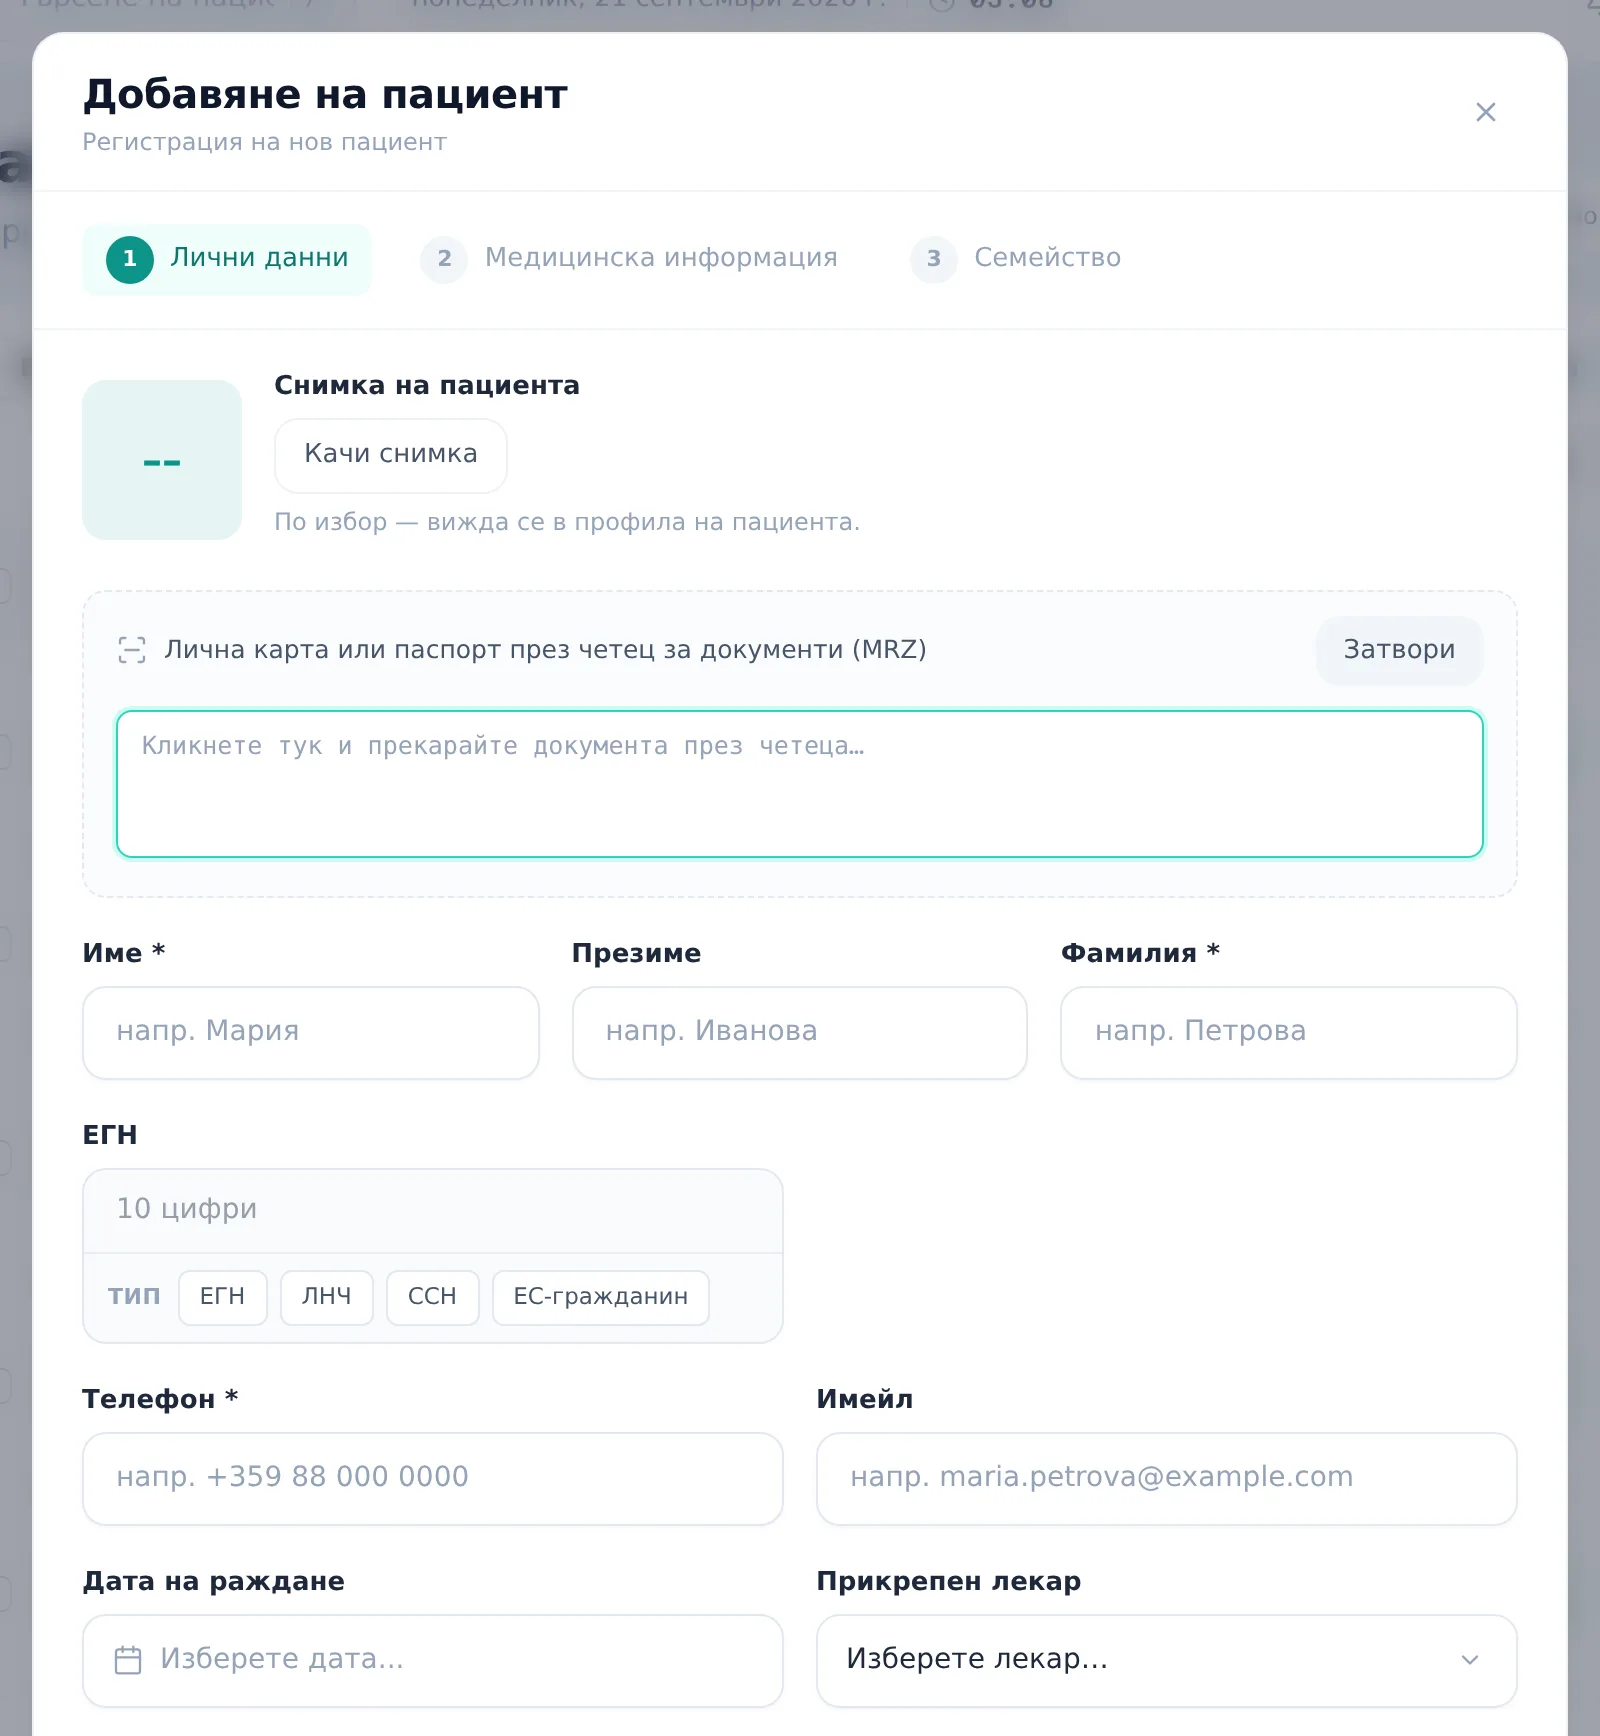
- Open Patients (Пациенти) from the sidebar and click Add Patient (Добави пациент) at the top right (or Add Patient (Добави пациент) in the empty list).
- Step “Personal (Лични данни)”, section “Photo and ID (Снимка и документ)”: optionally upload a patient photo and click Scan document (Сканирай документ), then swipe an ID card or passport through an MRZ reader to auto-fill the national ID number, names and date of birth. In the “Name and ID number (Име и ЕГН)” section type First name (Име), Last name (Фамилия) (optionally Middle name — Презиме) and National ID (ЕГН), picking the identifier type (ЕГН / ЛНЧ / ССН / ЕС-гражданин) if it’s not auto-detected.
- In the same section fill in Date of birth (Дата на раждане) (or click Derive from ЕГН (Извлечи от ЕГН) once it appears) and gender, and — for female patients — Pregnancy / breastfeeding (Бременност / кърмене) status. In “Contact and address (Контакт и адрес)” enter Phone (Телефон) (required) and optionally Email (Имейл); in “At the clinic (В клиниката)” pick the Assigned Doctor (Прикрепен лекар).
- In “Contact and address” add City (Град), Street (Улица) and Postal code (Пощенски код) — the city feeds the NHIS ambulatory sheet and e-prescription, and both are refused without it.
- Step “Medical (Медицинска информация)”: list Allergies (comma-separated) (Алергии (разделени със запетая)), Past diseases (Минали заболявания), Concurrent diseases (Придружаващи заболявания) and free text in Medical Notes (Медицински бележки).
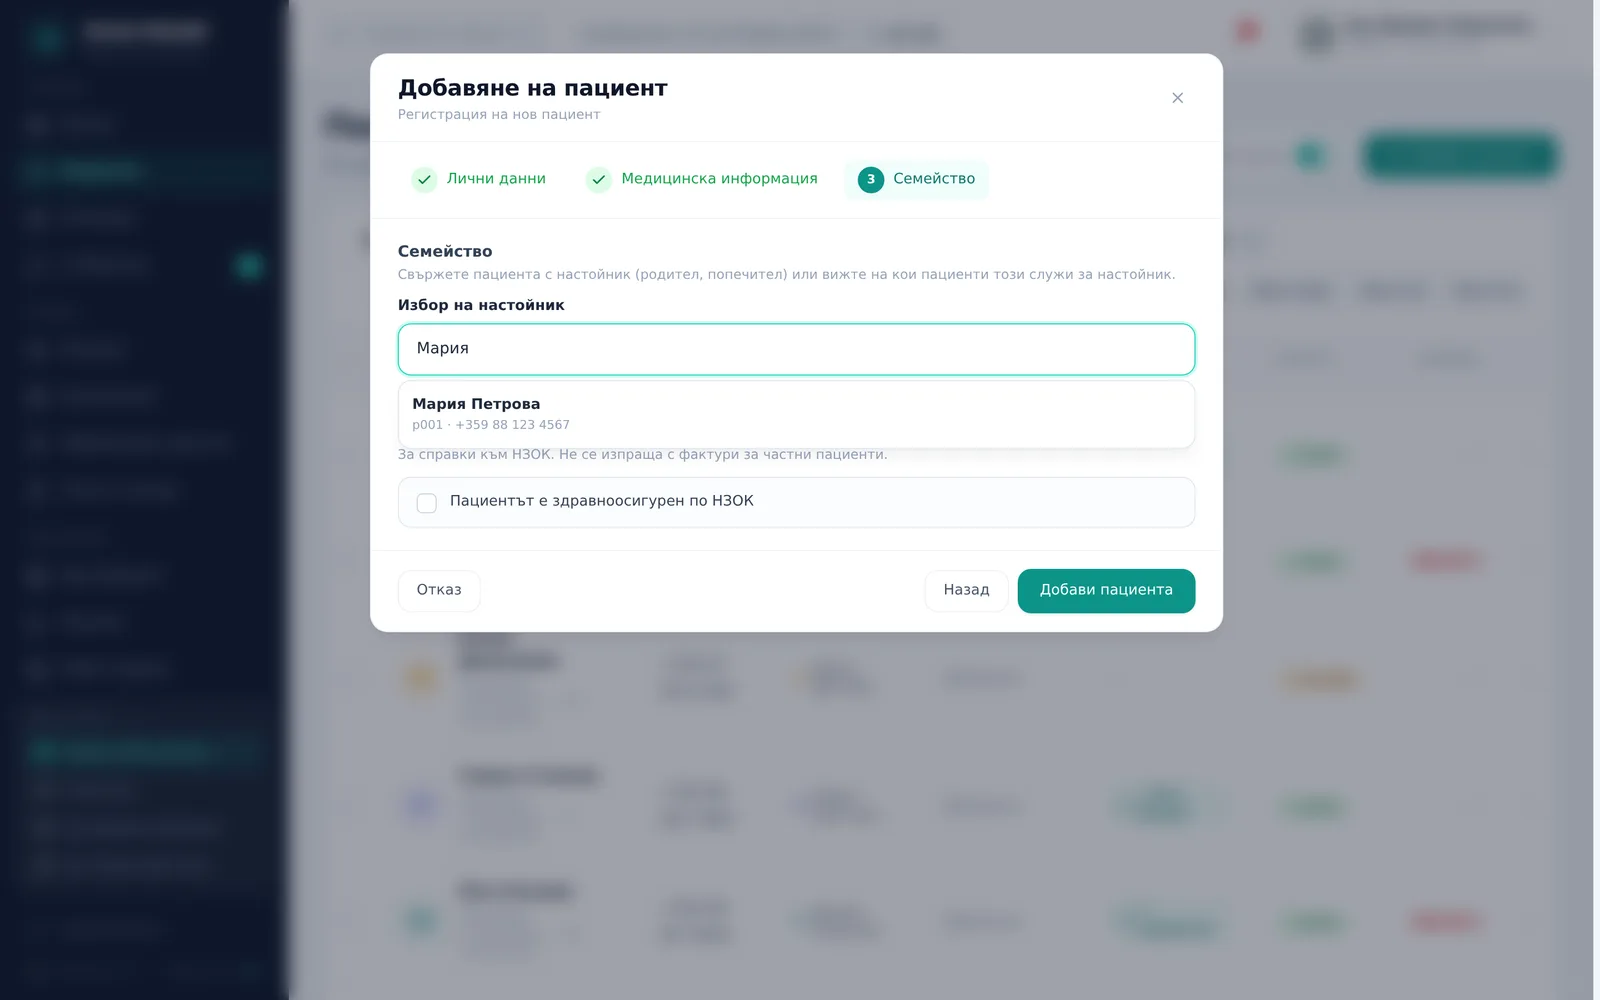
- Last step “Family (Семейство)” (called “Family & Insurance — Семейство и осигуровка” when the private-insurance module is on): search and pick a guardian in Pick guardian (Избор на настойник) if this patient is a dependent. If the clinic works with NHIF, the step also has a “Health insurance (Здравно осигуряване)” section — a tick that the patient is NHIF-insured, and the insurance type.
- Click Add Patient (Добави пациента) to save.
Searching, filtering and sorting the list
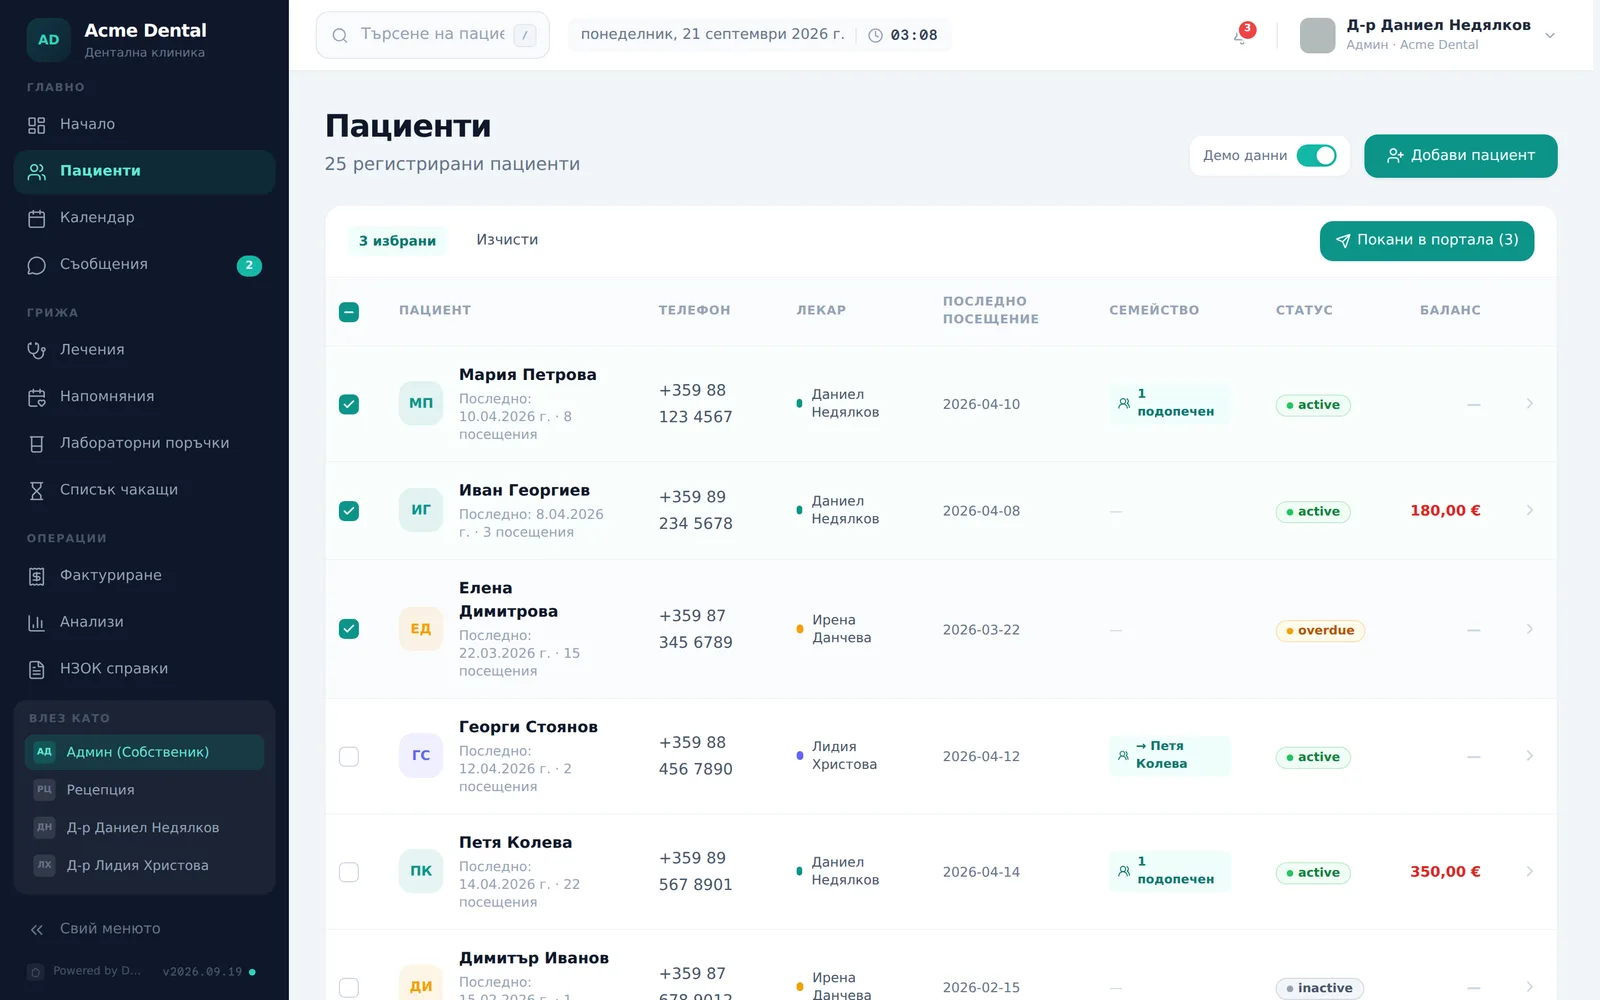
- Type in the top search box — it matches first and last name (in BG or EN), phone, email or patient ID. A doctor sees only their own patients by default and switches between My Patients (Моите пациенти) and All Clinic (Цялата клиника).
- Use the filter pills — All / Active / Overdue / Inactive / Untagged / Invited, never logged in / Archive (Всички / Активни / Просрочени / Неактивни / Без тип идентификатор / Поканени, без вход / Архив) — each shows a live count. “Overdue” appears only when the Recall reminders (Напомняния за прегледи) module is on, and “Invited, never logged in” only when there are such patients.
- Use the sort pills — Newest first / Oldest first / Name A–Z / Name Z–A (Най-нови / Най-стари / Име А–Я / Име Я–А).
- Select rows with the checkboxes to reveal the bulk-action bar, then click Invite to portal (N) (Покани в портала (N)) to send portal invites to every eligible selected patient at once. Patients with no email, an undeliverable email or the Do not send via email (Не изпращай чрез имейл) tick are skipped. For such a patient Invite to portal (Покани в портала) in the profile’s More actions menu is disabled too — its tooltip says why, e.g. “The patient opted out of email (“Do not send via email”)” (Пациентът е отказал имейли („Не изпращай чрез имейл“)).
Editing, archiving, restoring or deleting a patient
- Open the patient’s profile and click More actions (Още действия) at the top.
- Choose Edit (Редактирай) to reopen the same 3-step wizard, pre-filled (save with Save Changes (Запази промените)) — Admin/Front Desk only; it is disabled for Doctors.
- Choose Archive patient (Архивирай пациента) (Admin only) to hide the record from the active list — reversible, with no extra confirmation and no reason field. Archived patients do not appear under the ordinary filters; the Archive (Архив) filter shows them.
- Click Restore from archive (Възстанови от архив) on the archived banner (or in the same menu) to bring a patient back.
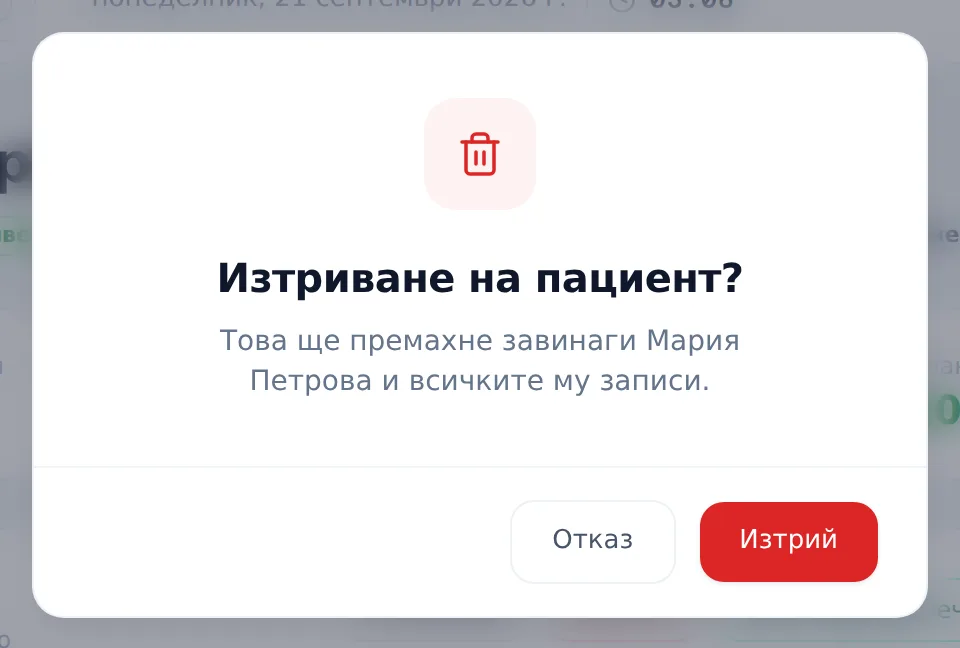
- Choose Delete (Изтрий) (Admin only) and confirm — the app warns that this removes the patient “forever” with all their records, and there is no way to bring them back from there. If a patient was entered twice, use Merge duplicate (Обедини дубликат) from the same menu instead (Admin only): the duplicate’s appointments, visits, plans, invoices, documents and prescriptions move to the surviving patient, and the duplicate is archived, not deleted.
Linking a guardian and dependent
- In the wizard’s Family step, type into Pick guardian (Избор на настойник) to search existing patients by name, phone or ID (up to 8 matches are shown).
- Pick a match. When you edit a patient who is themselves a guardian of others, a “Has dependents (Има подопечни)” badge with the count appears under the field.
- Click Remove guardian (Премахни настойника) to unlink, or leave the field blank for none.
- On wide screens the Patients list shows a Family (Семейство) column with ”→ Guardian Name” or a dependents count for quick spotting.
Frequently asked questions
Who can add, edit or delete a patient? Any role with access to Patients can click Add patient — the button itself isn’t role-restricted. Editing is Admin and Front Desk only. Archiving, deleting and merging duplicates are Admin only.
What happens if I delete a patient by mistake? Deletion can’t be undone from the app. If you’re not certain, use Archive patient instead of Delete: the patient disappears from the active list but shows under the Archive filter and can be restored anytime.
Why do I get an error adding a patient whose national ID already exists? You’ll see a generic “Error creating patient” toast — the app doesn’t show a specific “already exists” message outside the CSV import flow, which has its own duplicate-handling logic. Search for the patient (and the Archive filter) first before trying again. See Importing patients from CSV/Excel.
Why won’t the national ID field accept what I typed? It must be exactly 10 digits (“ЕГН трябва да е точно 10 цифри.”) — any other length shows a live validation error and blocks moving to the next step. First name, last name and phone are also required to move on.
Can search find an archived patient? Only through the Archive filter: the ordinary filters do not show archived patients. Open Archive and use the search box there.