Treatment plans
A treatment plan is a structured proposal with a clinical assessment, phases of procedures and a running cost summary that can be presented to the patient for approval. This guide covers building a plan, adding phases and procedures, presenting it, and tracking the patient’s decision. Creating a plan is restricted to Admin or Doctor. The app screenshots show the Bulgarian interface; every label below gives the Bulgarian original in parentheses.
At a glance
- Plans are created from Generate Treatment Plan (Изготви лечебен план) / New Plan (Нов план) on the patient profile, or from Treatment plan (Към плана за лечение) on the tooth chart.
- Creating a plan is restricted to Admin or Doctor — the button is disabled for Front Desk.
- The Presented to Patient (Представен на пациента) status shows the plan in the patient portal (and emails „Вашият план за лечение е готов“ if the patient has an email address and hasn’t opted out of email). The patient taps Accept plan (Приеми плана) or Request changes (Поискай промени); the decision is saved, the status changes by itself and you get a notification.
- There is no delete button for a plan — the only way to retire one is to set its status to Rejected.
- You can start from a built-in template or your clinic’s saved template and adjust the procedures and prices.
- A plan can be split into instalments (Admin and Front Desk), and — if DentaFlow has switched the matching modules on — turned into a patient document and checked for informed consent line by line. See below.
Creating a plan (from a template or blank)
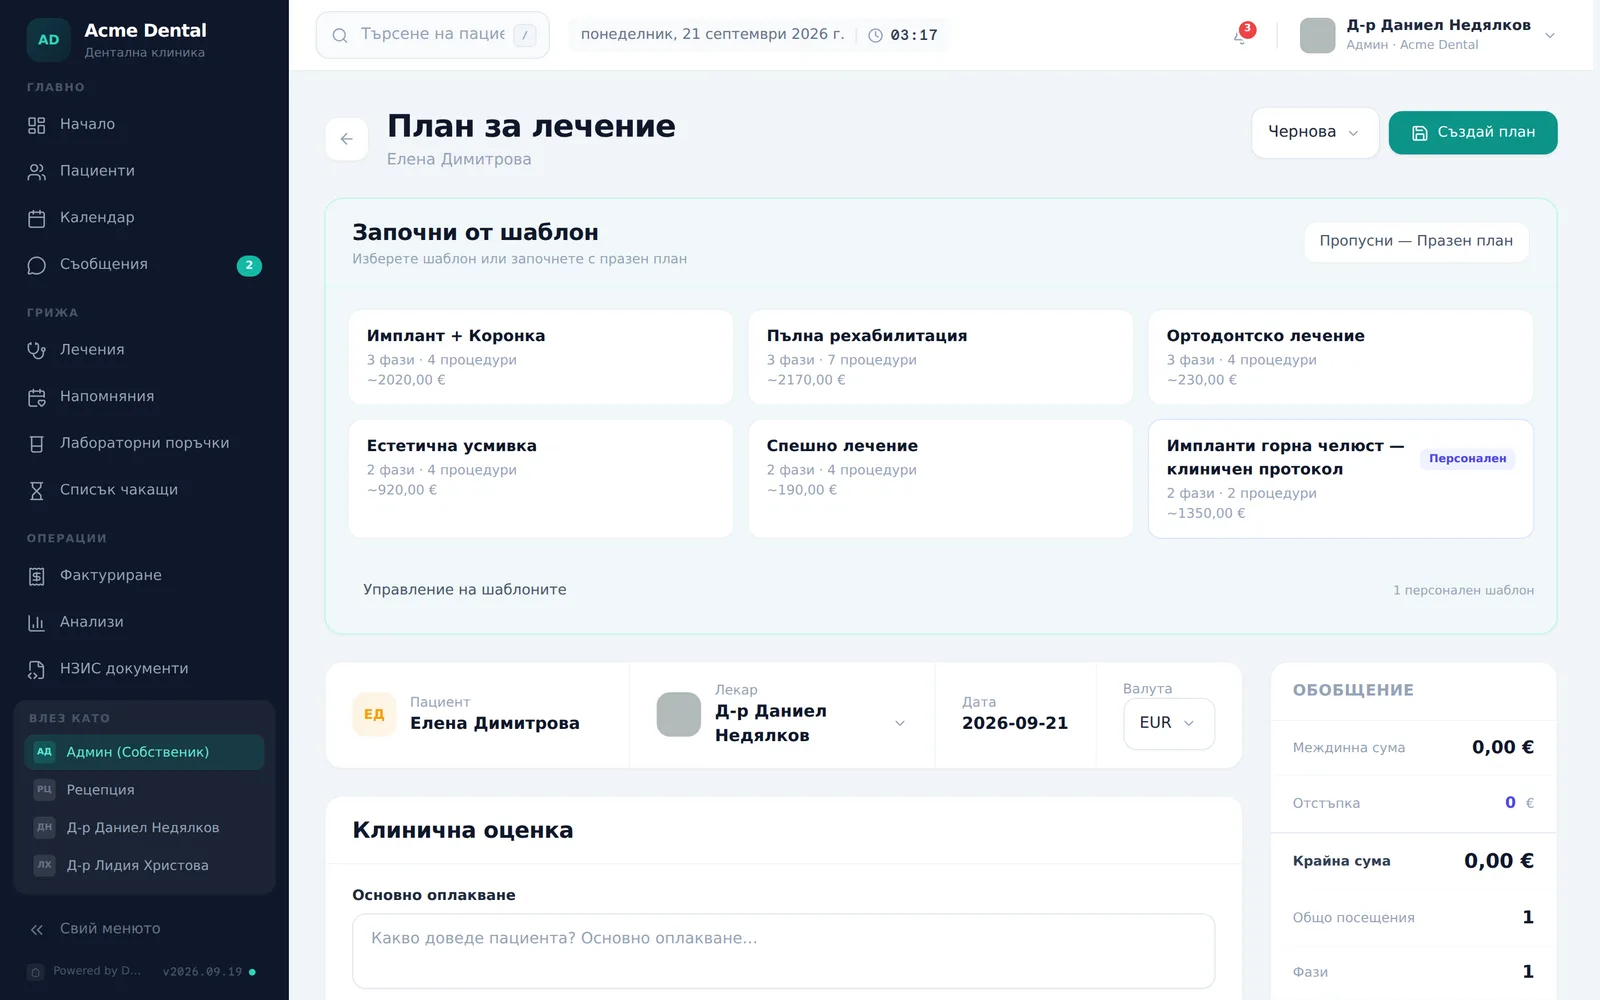
- From the patient’s profile, click Generate Treatment Plan (Изготви лечебен план) (or New Plan (Нов план) in the treatment plans section).
- In Start from a Template (Започни от шаблон), choose a built-in template by category. If custom templates are available for the selected doctor, you will also see Mine (Мои). Click Skip — Blank Plan (Пропусни — Празен план) to start from scratch.
- Confirm or select the treating Doctor (Лекар) from the doctor picker in the top bar.
- Fill in Chief Complaint (Основно оплакване), Clinical Findings (Клинични находки) and Diagnosis (Диагноза) in the Clinical Assessment (Клинична оценка) card.
- Set the plan’s Status (Статус) from the dropdown: Draft / Presented to patient / Accepted / In progress / Completed / Rejected (Чернова / Представен на пациента / Приет / В процес / Завършен / Отхвърлен). Changes requested (Поискани промени) appears in the list only when the patient has set it from the portal — you cannot pick it yourself.
- Next to the status is the plan’s Currency (Валута) (from the currencies allowed for the clinic in settings).
If DentaFlow has switched on “Clinical pathways”, a Clinical Wizard (Клиничен уизард) button also appears in the top bar — it is off for now and works with draft rules no clinician has reviewed yet.
Adding phases and procedures, adjusting cost
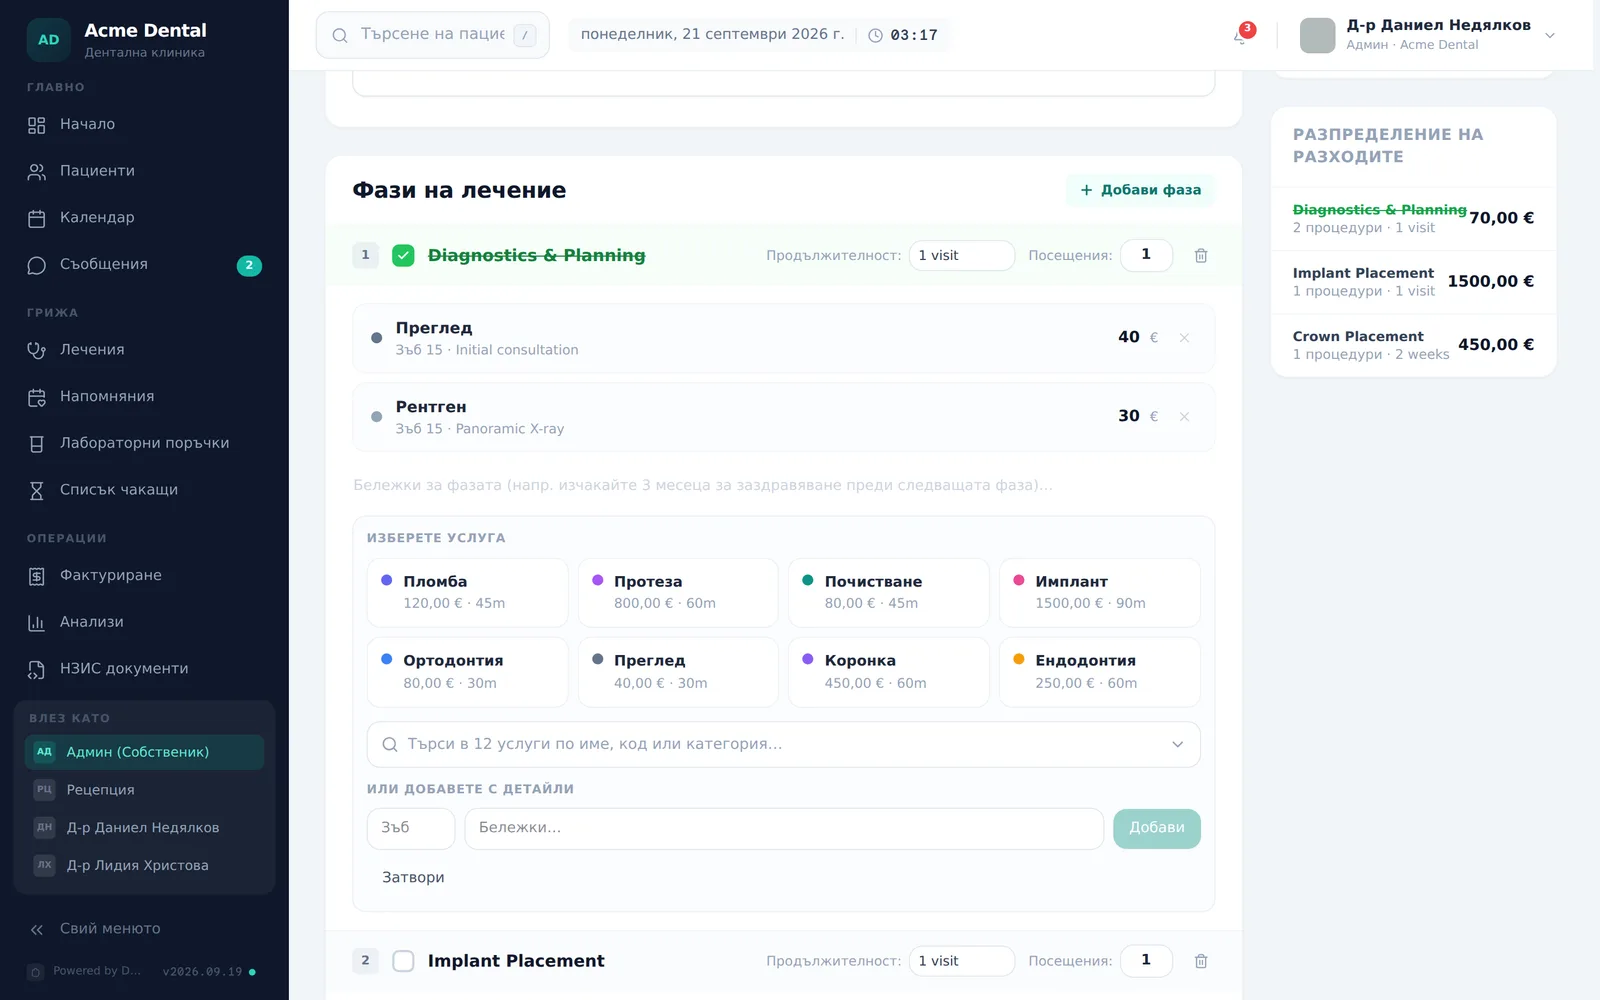
- Click Add Phase (Добави фаза); name it and set Duration: (Продължителност:) / Visits: (Посещения:).
- Click Add treatment (Добави лечение), pick a service from the smart picker (the 8 most-used pills plus search), optionally add a Tooth (Зъб) number and notes, then Add (Добави).
- Adjust any line’s cost inline, or use Mark complete (Маркирай като завършена) on a phase to track progress.
- Enter a discount in the sidebar Discount (Отстъпка) field — it is one amount for the whole plan. The Summary (Обобщение) card recalculates the Final Total (Крайна сума), total visits and procedures at once.
- Click Create Plan (Създай план) / Save Plan (Запази плана).
Presenting to the patient and tracking approval
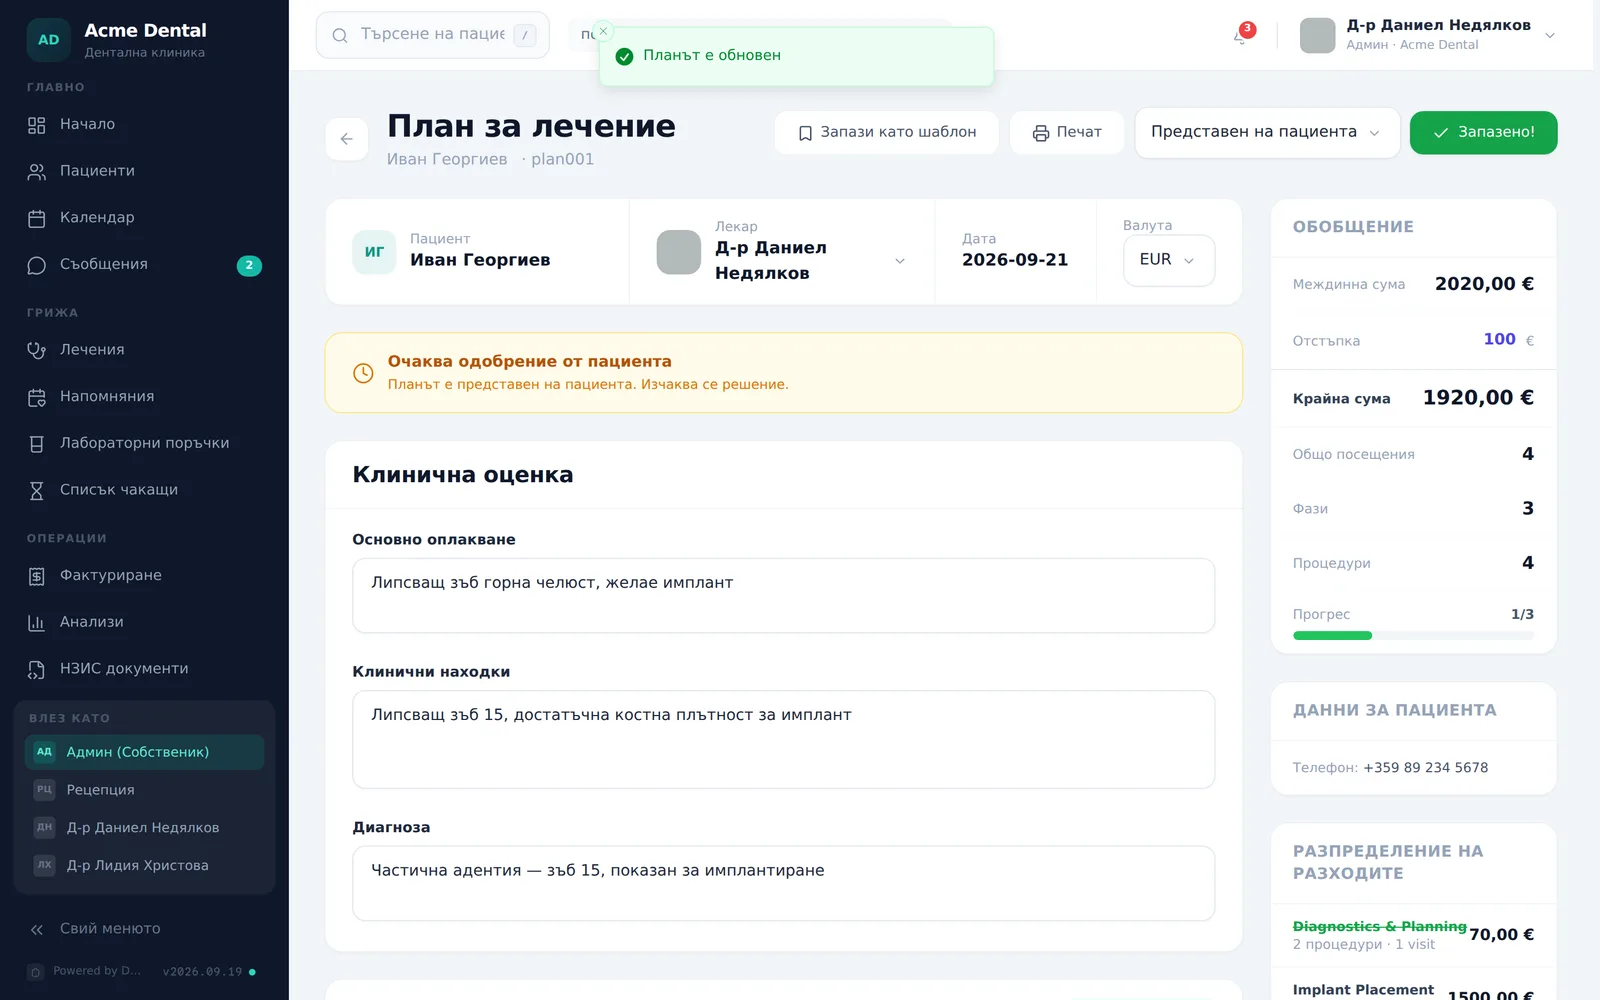
- Set the status to Presented to Patient (Представен на пациента) and click Save Plan (Запази плана). The plan shows an amber “Awaiting Patient Approval” banner (Очаква одобрение от пациента) and appears in the patient portal with Accept plan (Приеми плана) and Request changes (Поискай промени). If the patient has an email address and hasn’t opted out of email, they get the email „Вашият план за лечение е готов“ (your treatment plan is ready).
- When the patient accepts in the portal, the status becomes Accepted (Приет), the banner reads “The patient accepted the plan in the portal on {date}. Ready to schedule.” (Пациентът прие плана в портала на {дата}. Готов за насрочване.), and the bell at the top shows the notification „Пациент прие план за лечение“ (a patient accepted a treatment plan).
- If the patient asks for changes, the status becomes Changes requested (Поискани промени), the “The patient asked for changes” banner (Пациентът поиска промени) lists their notes with dates, and the dashboard counts them under Plan reviews (Планове за преглед). Edit the plan and set the status back to Presented to Patient (Представен на пациента) so they see it again.
- If the decision is made chairside, set Accepted (Приет) or Rejected (Отхвърлен) yourself — Accepted shows a green “Patient Accepted” banner (Пациентът прие), Rejected a red “Patient Declined the Plan” banner (Пациентът отхвърли плана).
Saving as a reusable template, or printing
- With at least one procedure added, click Save as Template (Запази като шаблон), enter a Template Name (Име на шаблона) and click Save Template (Запази шаблон). Phases, procedures and prices are saved for reuse in your clinic and remain after a reload. A template linked to a doctor appears when that doctor is selected for a new plan. In demo mode, custom templates are temporary.
- Open Manage templates (Управление на шаблоните) in the template picker, click Delete (Изтрий) on a custom template and confirm. Built-in templates cannot be deleted.
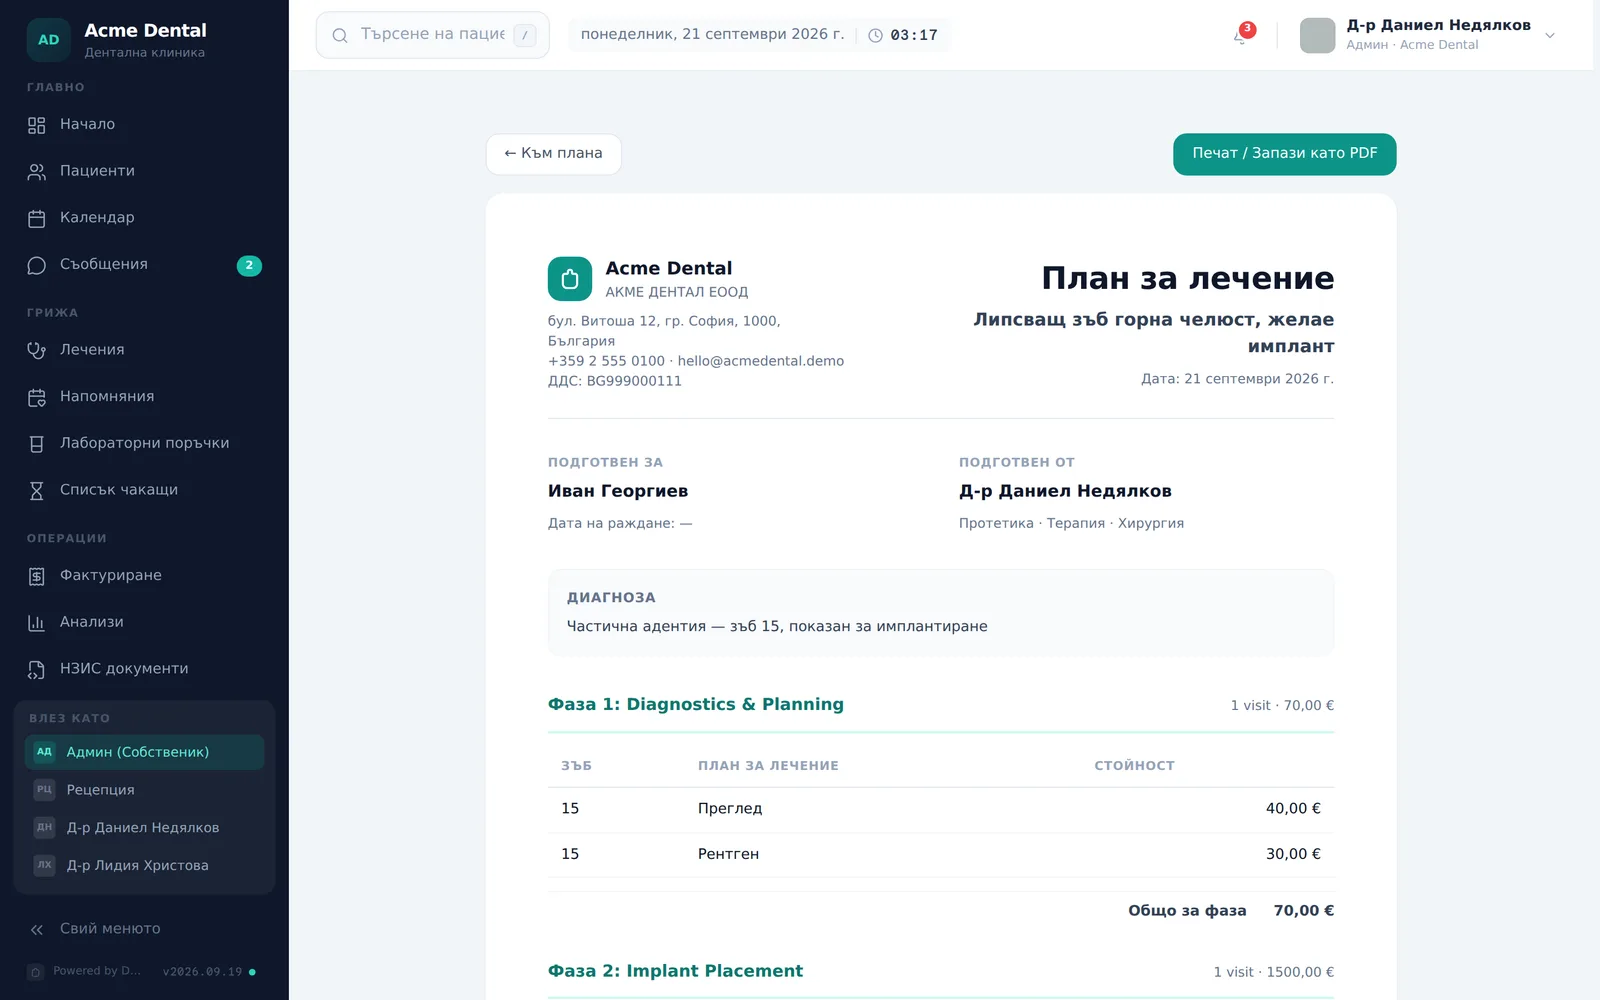
- Click Print (Печат) — the plan opens for printing in a new tab with Print / Save as PDF (Печат / Запази като PDF), with signature lines for the patient and the doctor. The printout also includes the clinical notes from the patient’s visits — check it before handing it to the patient.
Consent on each line
This part shows only if DentaFlow has switched on the “Informed consents” and “Consent coverage” modules for your clinic (both are off by default). Then:
- Each plan line gets a badge based on the service’s rule (Consent needed, Recommended, Consent ✓, Scope changed). A line typed by hand without a price-list service gets a grey “Not clear whether consent is needed” (Не е ясно дали е нужно съгласие) badge.
- Next to the line are Issue (Издай) / Sign (Подпиши) and Record exception (Запиши изключение) buttons (after recording — Details (Детайли)). The plan must be saved first — otherwise the button says “Save the plan to issue a consent”. A bar at the top counts the procedures that need a written consent, with an Issue consent (Издай съгласие) button; a red bar shows procedures with a signed refusal of treatment.
- Only a doctor or an admin can record a clinical exception. Issuing and exceptions work for test patients only for now.
The whole flow is described in Informed consents.
Patient document (optional)
This part shows only when the module Patient documents (Документи за пациенти) is switched on under Settings → Modules (off by default), the clinic is not a demo, the plan is saved, and you are Admin, Front Desk or Doctor. The plan’s top bar then has Prepare patient document (Подготви документ за пациента). If the plan is in BGN the button is disabled — convert the plan to euro and save it.
The document is prepared in four steps that stay pinned at the top; changes are saved automatically (“Saving…” / “Saved”).
- Content (Съдържание) — choose which sections go into the document: Your treatment plan, Stages and estimate, Selected images, Next steps, Terms. An empty section is left out. Below them you write text for the patient (treatment goals, what we found, approach, next steps, quote validity — up to 4000 characters each). The chief complaint and diagnosis from the plan are shown read-only and never copied automatically.
- Explanations and images (Обяснения и изображения) — up to 12 approved texts from the clinic’s library (guarantee texts are never pre-selected) and up to 8 images from the patient’s documents (you can add new ones with Upload photos (Качи снимки): JPG, PNG or WEBP, up to 10 MB each). Each image has a caption (up to 300 characters) and a date. The document holds a copy of at most 1600 px; the original is untouched.
- Estimate (Оценка) — the amounts come from the server. For each row you pick a pricing basis (Fixed, Package or Quantity × unit price). A zero-priced row is issued only if a doctor confirms Confirm: no charge (Потвърди: безплатно). Checks are Blocks, Review or Info; while a blocking one remains you cannot create a version. A document is limited to 8 images, 3 MB and 150 rows.
- Versions (Версии) — Create preview version (Създай версия за преглед) freezes the content, prices and data as of that moment; any later change makes a new version. A PDF is generated for it (Preview PDF (Преглед на PDF); if it fails, Request rendering again (Поискай ново генериране)). From here:
- Approve this version (Одобри версията) — a doctor; an admin only if they have a doctor profile in the clinic.
- Publish to the patient (Публикувай за пациента) — Admin or Doctor, after approval and a ready PDF, and only while the plan’s status is Presented to Patient. If another version is already published, the new one replaces it and the old one stays in the history.
- Withdraw (Оттегли) — Admin or Doctor, with an optional reason (up to 500 characters). The patient can no longer download it; copies already downloaded cannot be recalled.
The patient sees the published version in the portal and accepts it or asks for changes there. Acceptance sets the plan to Accepted (Приет), and a request for changes sets it to Changes requested (Поискани промени), with the plan banner naming the version. The answer is a new version published from the Versions step.
AI wording. The AI wording (AI формулировка) button in the Content step appears only if DentaFlow has switched the feature on for your clinic — there is no switch for it in Settings. The assistant suggests text from data you confirm; you choose the sources, confirm what is sent, and decide per section: Accept (Приеми), Edit & accept (Редактирай и приеми) or Reject (Отхвърли). Nothing enters the document without your decision, and the clinic has a daily limit. Read every suggested text before accepting it.
Settings → Patient documents (Документи за пациенти) (when the module is on): an Admin or Doctor maintains the library of approved texts (saving is the review — who and when are recorded). Only an Admin also sees Document statistics (Статистика на документите) (counts and step timings, no names or clinical data), a JSON export of one patient’s documents, and Document erasure and holds (Изтриване и задържане на документи). A hold stops erasure within its scope; an erasure request must be authorised by a second admin and starts only when it is run. Issued (published) documents cannot be erased until retention periods are approved, and nothing is deleted automatically.
Frequently asked questions
How do I delete a plan I no longer need? You can’t — there is no delete button for a plan anywhere in the UI. The only way to retire one is to set its status to Rejected (Отхвърлен); it stays in the patient’s plan history permanently.
How does the patient actually accept the plan? In the patient portal. Once you set Presented to Patient (Представен на пациента) and save, the plan appears in the portal with Accept plan (Приеми плана) and Request changes (Поискай промени). The decision is saved, the status changes by itself (to Accepted or Changes requested) and you get a notification. See My Treatment Plan.
If I delete a template, do I lose the plans built from it? No — deleting a custom template only removes the template itself; plans already built from it are unaffected.
Saving stops with “This plan was changed in the meantime…” — what do I do? Someone changed the plan while you were editing it — in another tab, by saving a visit, or because the patient accepted the plan or asked for changes in the portal. DentaFlow doesn’t overwrite the newer version and shows “This plan was changed in the meantime (another tab, a visit or the patient’s decision). Reload the page — your edits are still on screen.” (Планът е променен междувременно (друг раздел, посещение или решение на пациента). Презаредете страницата — промените ви още са на екрана.) Your edits aren’t saved: note them down, reload the page and apply them again to the current plan.
Can I add treatments to a plan straight from the tooth chart? Yes — Propose treatment (Предложи лечение) in the tooth panel adds the service, with the tooth number and catalogue price, to the current plan (Draft or In Progress) or creates a new draft plan. If you add it to the current plan, open the plan and click Save Plan (Запази плана) so it’s stored. See The tooth chart.
Can I split the plan into instalments? Yes, while the module “Instalment plans” (Плащане на вноски) is on (it is on by default). For a saved plan that is Accepted or In Progress and has no active instalment plan, the sidebar offers Split into instalments (Разсрочи на вноски) (for Admin and Front Desk; a Doctor sees the schedule but cannot create it). You choose the number of instalments (up to 60), the interval — monthly or every N days — and the first due date, plus an optional down payment and a note the patient can see. From 20.11.2026 the whole amount must be paid within 50 days of the plan’s earliest treatment (otherwise the schedule counts as consumer credit): the form shows the latest due date, suggests a schedule that ends on it and will not create a longer one. The whole plan’s final total is split, not individual phases; anything already paid under an earlier plan is shown. Once an instalment plan exists, the same card shows its progress.