The tooth chart
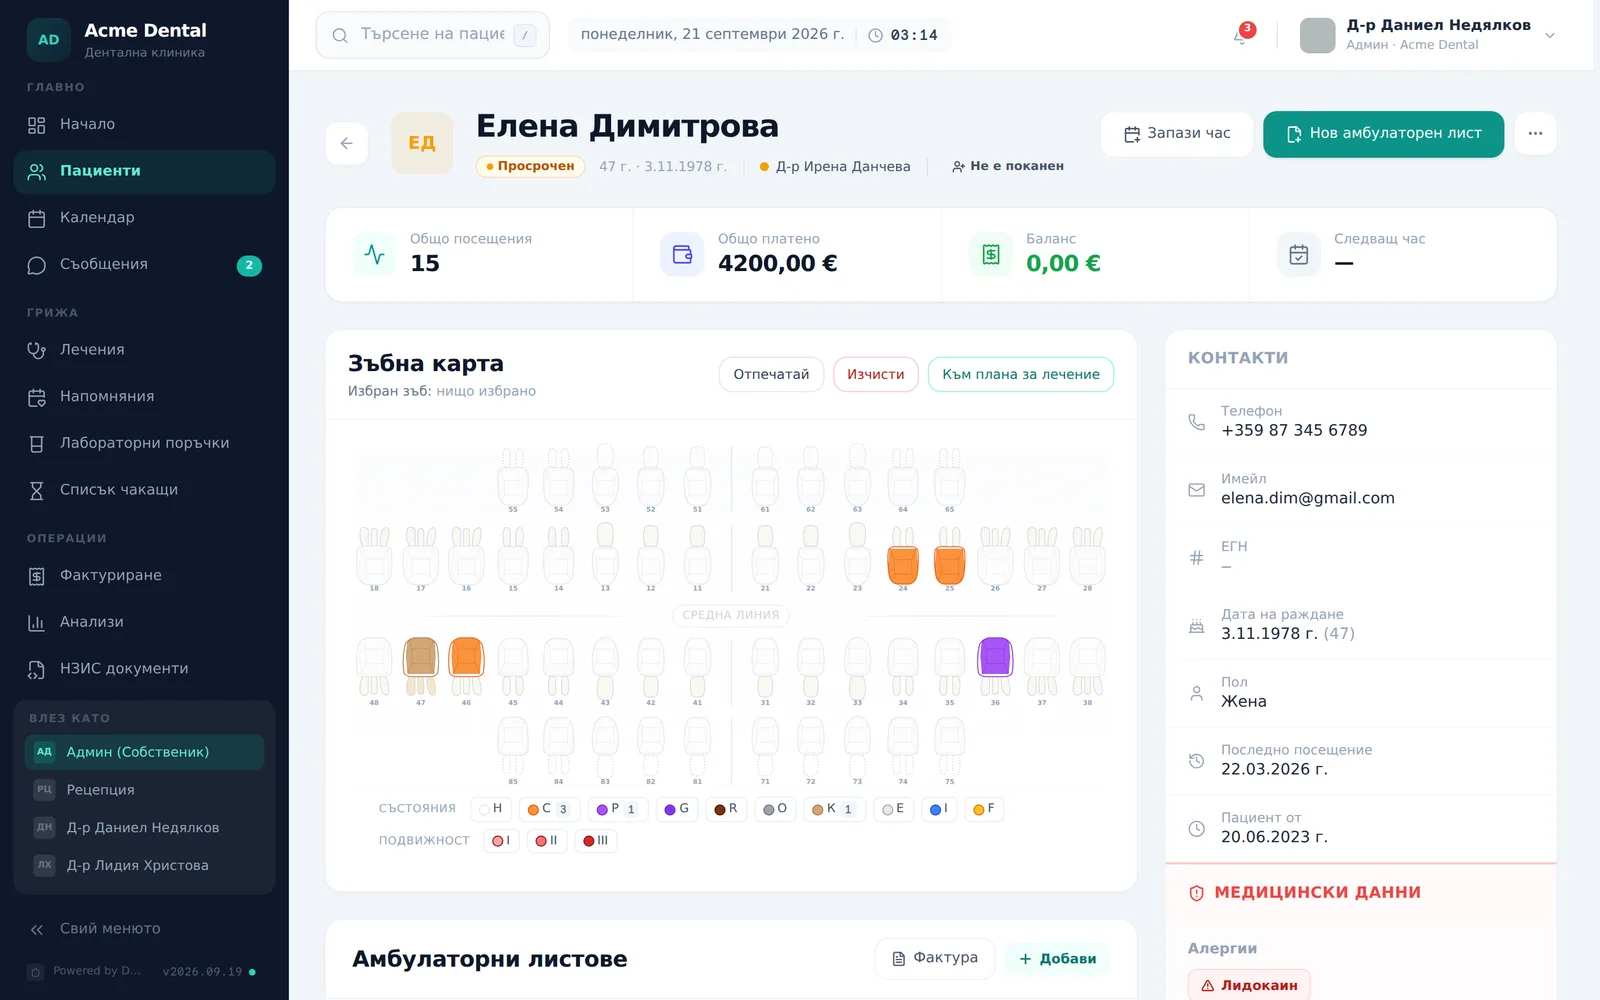
The tooth chart is an interactive odontogram embedded in every patient’s profile — it shows the condition of each tooth and surface, the change history, and a direct path to a treatment plan. This guide applies to every staff role: Admin, Front Desk and Doctor (with a note on where marking is restricted). The app screenshots show the Bulgarian interface; every label below gives the Bulgarian original in parentheses.
At a glance
- The tooth chart sits right under the stat cards on the patient profile, with FDI numbering.
- Click a tooth and its panel opens on the right. Pick the condition and press Apply (Постави) — nothing is saved until you do.
- Every role can view the chart; marking follows the same permissions as logging a visit (Admin, Front Desk, Doctor).
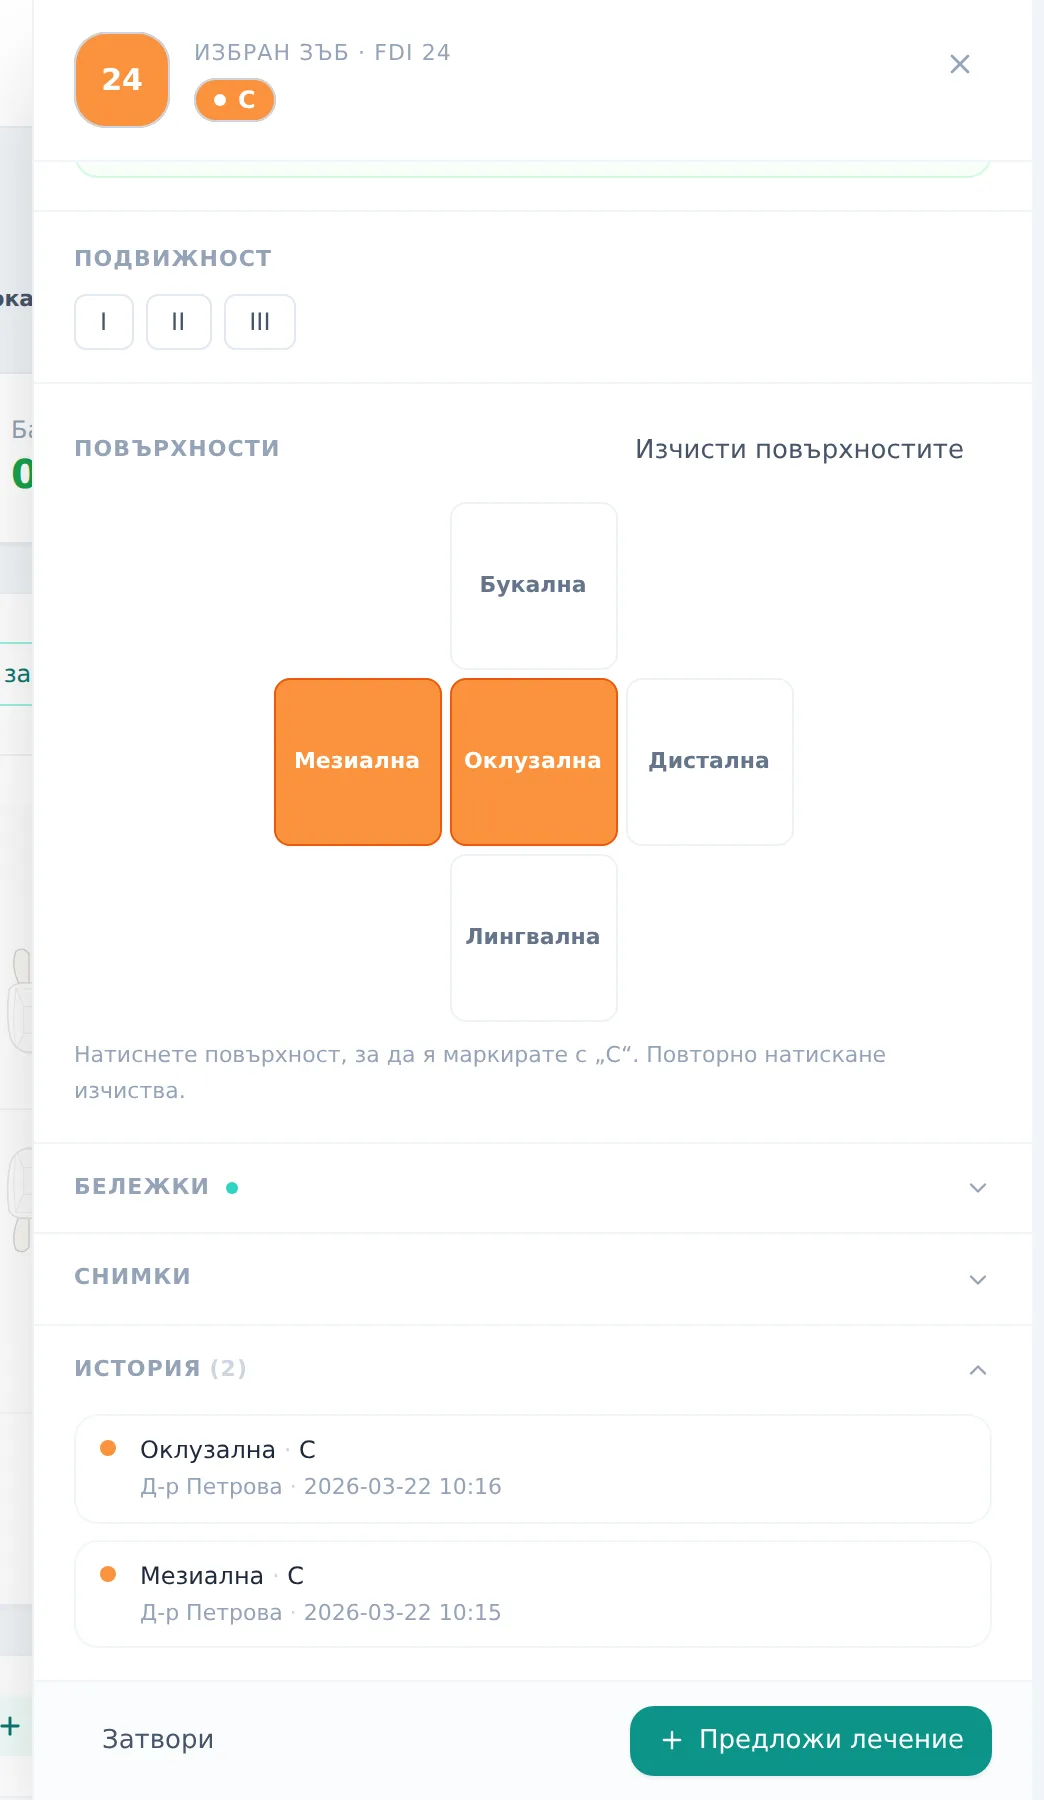
- Clicking a tooth opens an inspector with its history, photos, and a Propose treatment (Предложи лечение) shortcut straight into a treatment plan.
- Clear (Изчисти) resets the whole chart and is irreversible — it shows an explicit confirmation dialog.
Marking a tooth’s condition or a surface
- Click a tooth (or one of its surfaces) — the selected-tooth panel opens on the right. Clicking only selects the tooth.
- Under Tooth condition (Състояние на зъба), pick a condition and press Apply: {condition} (Постави).
- For caries, filling, fracture and calculus, press a surface under Surfaces (Повърхности) to mark it; press it again to clear it. Clear surfaces (Изчисти повърхностите) resets the tooth’s surfaces.
- Under Mobility (Подвижност), pick I, II or III (or Clear (Изчисти)).
- Add text in Notes (Бележки) — it’s saved when you leave the field.
To return a tooth to healthy, pick “Интактен зъб” (intact tooth) and press Apply. The legend below the chart is a filter: press a condition and the teeth without it fade.
Reviewing a tooth’s history and proposing treatment
- Click a tooth to open the inspector panel.
- Scroll to History (История) to see every past condition change with its date.
- Scroll to Images (Снимки) to see any X-rays/photos tagged to that tooth number (uploaded via the Documents section).
- Click Propose treatment (Предложи лечение) to open a service picker (recommended services for that condition, or search the full catalog) and add it to the current plan (Добави в текущия план) — “Add to current plan” — (when a draft or in-progress plan exists) or with Create a new plan (Създай нов план).
Printing the tooth chart
- Click Print (Отпечатай) in the chart’s action row (or use the standalone
/patients/:id/tooth-chart/printlink). - A “Dental status” (Зъбен статус) sheet opens with the chart and a findings table (tooth, condition, surfaces, mobility, notes) for the teeth with a finding only. If there are none, it shows “No recorded findings — all teeth are intact.” (Няма отбелязани находки — всички зъби са интактни.)
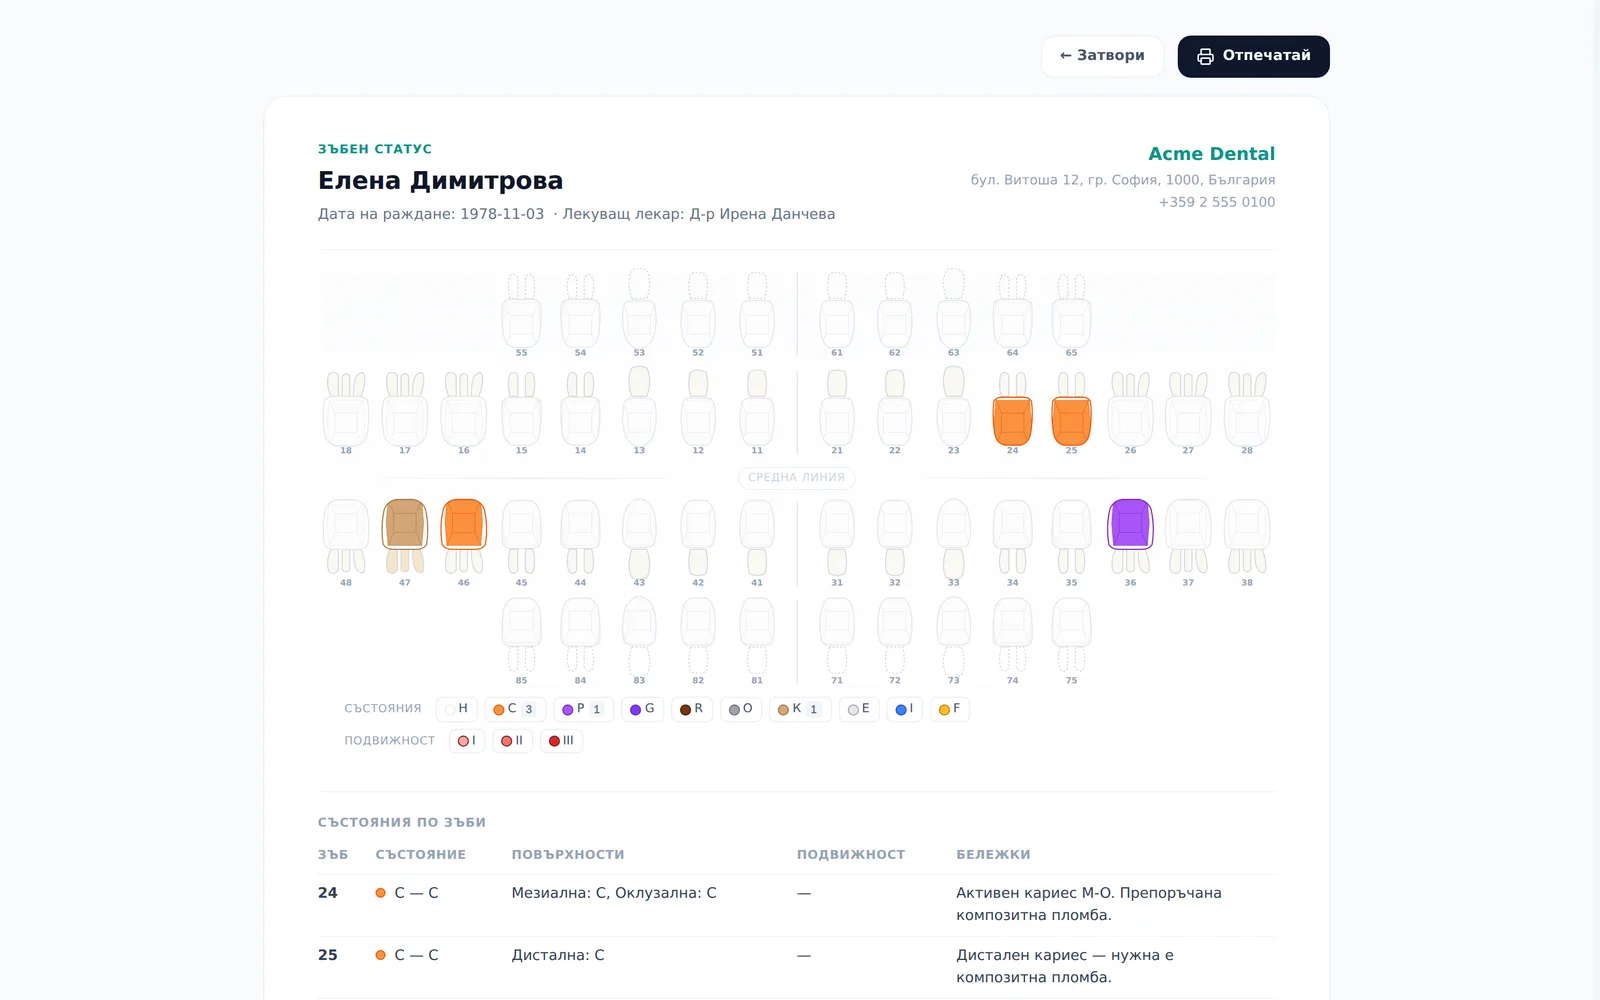
Frequently asked questions
Can I undo Clear if I click it by accident? No. Clear (Изчисти) resets every tooth to “Intact” and shows an explicit dialog warning the action is irreversible. You confirm with Clear all (Изчисти всичко) and there’s no undo after that. Mobility and notes are kept.
Why does one tooth show both a caries color and a separate mobility badge? Mobility (CL109) is tracked independently from the whole-tooth condition (CL107) — they live separately, so a tooth can show a caries fill color and a mobility badge at the same time.
How do I mark a supernumerary tooth? Pick the “Свръхброен зъб” (supernumerary tooth) condition on the neighbouring tooth. Separate supernumerary positions exist only in the visit’s tooth map.
Why is the surfaces grid disabled for some conditions? Surfaces can be marked only for caries, filling, fracture and calculus. For every other condition the grid is disabled with the hint “This condition applies to the whole tooth — surfaces don’t apply.” (Това състояние се отнася за целия зъб — повърхностите не са приложими.)
Where do the photos in the inspector come from? From the patient’s documents section — on upload they’re tagged with FDI tooth number(s), and then appear under Images (Снимки) for that tooth. See Documents & imaging.